A practical, editor-style walkthrough for founders, marketers, and event teams who need polished tote bag designs without advanced design software experience.
Introduction
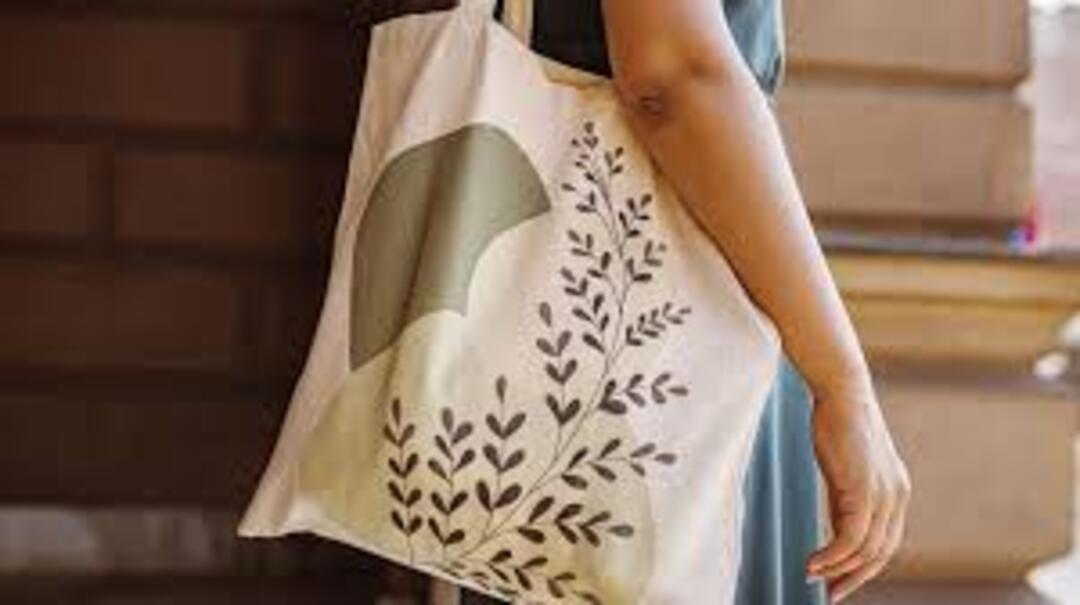
Branded tote bags continue to serve as durable, low-cost brand extensions. They appear at trade shows, retail counters, campus events, and internal company gatherings. Because they are functional objects, they often remain in circulation longer than single-use promotional materials.
For small teams without in-house designers, the challenge is usually not creativity but structure. Layout sizing, print requirements, and file preparation can introduce friction. Tote bag mockup design tools reduce that complexity by offering pre-sized templates, drag-and-drop text controls, and realistic product previews.
Browser-based platforms such as Adobe Express make it possible to work within print-safe dimensions and preview artwork on a fabric mockup without installing professional design software. Using the Adobe Express tote bag template early in the process can help avoid common sizing and export mistakes while keeping the workflow approachable.
The steps below focus on clarity, print-readiness, and practical checkpoints rather than stylistic experimentation.
Step-by-Step How-To Guide for Using Tote Bag Mockup Design Tools
Step 1: Begin With a Print-Ready Tote Template
Goal
Set correct dimensions and margins before adding text or graphics.
How to do it
- Open a pre-sized tote canvas in Adobe Express.
- Confirm the final print size required by your vendor (for example, 14×16 inches).
- Review bleed and safe zone guidance if edge printing is involved.
- Duplicate the base design file to preserve a clean version.
- Rename the file using version control (e.g., Tote_Conference_v1).
What to watch for
- Designing in social media dimensions instead of print dimensions.
- Ignoring seam placement near handles.
- Forgetting bleed when artwork extends to the edge.
- Working in low-resolution mode.
Tool notes
For project coordination and task tracking, tools such as Asana can help assign design revisions, printer approvals, and deadline milestones without mixing them into the design file itself.
Step 2: Define a Single, Clear Message
Goal
Ensure the tote communicates one primary idea at a glance.
How to do it
- Draft a headline of five words or fewer.
- Add one secondary element (URL, event name, or date).
- Confirm alignment with campaign or event goals.
- Remove any non-essential supporting phrases.
- Test legibility by zooming out to 25% view.
What to watch for
- Multiple competing slogans.
- Decorative fonts that reduce clarity.
- Excessively long taglines.
- Text that loses impact from a distance.
Tool notes
If you need to validate how the headline reads across different audiences, lightweight survey tools such as SurveyMonkey can help collect fast preference feedback before finalizing the design.
Step 3: Apply Brand Colors With Print Contrast in Mind
Goal
Preserve brand identity while maintaining visibility on fabric.
How to do it
- Import official brand color hex codes.
- Adjust for contrast if printing on natural canvas or dyed fabric.
- Use dark-on-light or light-on-dark combinations.
- Limit the palette to one or two dominant colors.
- Preview against realistic tote backgrounds.
What to watch for
- Low-contrast combinations that fade into fabric.
- Using too many colors for screen printing budgets.
- Neon or subtle tones that shift during printing.
- Color overlays that reduce readability.
Tool notes
If coordinating physical sample shipments, logistics tools such as Shippo can help manage vendor-to-office deliveries for printed proofs.
Step 4: Incorporate Logos and Graphics at Proper Resolution
Goal
Ensure artwork remains sharp when printed at full scale.
How to do it
- Upload vector files (SVG, EPS) whenever possible.
- If using PNG, confirm at least 300 DPI at final size.
- Avoid enlarging small web-resolution logos.
- Keep graphic elements centered unless intentional asymmetry is part of the design.
- Preview at 100% zoom before export.
What to watch for
- Pixelation after scaling.
- Transparent backgrounds exporting incorrectly.
- Overly detailed graphics that lose clarity in screen print.
- Compression artifacts from repeated downloads.
Tool notes
For managing brand asset libraries centrally, cloud storage platforms such as Dropbox can maintain version-controlled logo files accessible to multiple collaborators.
Step 5: Review Layout Balance and White Space
Goal
Create a design that feels intentional and uncluttered.
How to do it
- Align text and graphics to a visible center axis.
- Maintain consistent spacing around edges.
- Leave breathing room between logo and headline.
- Use alignment tools to correct uneven margins.
- Compare two layout variations side by side.
What to watch for
- Elements too close to the tote edges.
- Misaligned typography.
- Crowded upper halves with empty lower sections.
- Designs that look centered digitally but shift visually on fabric.
Tool notes
For structured internal review cycles, collaboration platforms such as Notion can document revision notes and layout comparisons.
Step 6: Export in the Correct Print Format
Goal
Deliver a printer-ready file without resizing errors.
How to do it
- Export as high-resolution PDF (preferred) or PNG at 300 DPI.
- Confirm color mode matches printer specifications (often CMYK).
- Re-open exported file to check scaling.
- Verify no background transparency errors.
- Include bleed if required.
What to watch for
- Exporting in RGB when CMYK is required.
- Accidentally resizing during export.
- Flattened layers that remove transparency.
- Cropping marks omitted when necessary.
Tool notes
If coordinating bulk orders or promotional campaigns afterward, CRM platforms such as HubSpot can help track distribution and campaign attribution tied to the tote initiative.
Common Workflow Variations
Event Giveaway Variation
If producing totes for a conference or workshop, prioritize event name and date over product messaging. A bold headline and minimal secondary detail often performs better in crowded environments.
Retail Merchandise Variation
When designing for resale, test multiple typography treatments and consider subtle branding. Simpler designs often have broader appeal beyond a single campaign.
Internal Team Gift Variation
For company offsites or onboarding, add small personalization elements such as year markers or team identifiers. Keep internal references clear but not overly niche.
Cause-Based Campaign Variation
If the tote supports a nonprofit or awareness initiative, incorporate a short call-to-awareness phrase while preserving brand clarity. Avoid overcrowding the design with multiple mission statements.
Checklists
Before You Start Checklist
- Confirm final tote dimensions from printer.
- Gather official logo files in vector format.
- Identify brand hex codes.
- Clarify primary message (one sentence maximum).
- Determine fabric color.
- Confirm print method (screen print vs. direct-to-garment).
- Set internal approval timeline.
- Verify rights for any external graphics used.
Pre-Export / Pre-Order Checklist
- 300 DPI resolution confirmed.
- Bleed and safe margins applied.
- Spelling and grammar checked.
- Alignment visually centered.
- Color contrast verified against fabric.
- File exported in required format.
- Printer template overlay double-checked.
- Test proof reviewed at 100% zoom.
Common Issues and Fixes
Low-Resolution Artwork
If the logo appears blurry, replace raster files with vector formats. Avoid enlarging small web images beyond their native resolution.
Text Too Close to Edges
Shift content inward by at least 0.5 inches from edges to account for seams and stitching.
Unexpected Color Shift
Convert artwork to CMYK before export and request a physical proof if color fidelity is critical.
Cropping During Print
Verify bleed settings and confirm printer template overlays match your canvas size.
Design Looks Off-Center on Fabric
Recheck alignment against the tote’s printable area rather than the full canvas dimensions.
How To Use Tote Bag Mockup Design Tools: FAQs
Should beginners start with a blank canvas or a template?
Templates typically reduce sizing errors and speed up layout decisions. Blank canvases offer more flexibility but require closer attention to margins and print specs.
Is it better to design for screen first and adjust for print later?
Designing directly within print dimensions minimizes rework. Screen previews can be misleading in scale and contrast.
How many design variations should be tested?
Two to three layout variations are usually sufficient. Excessive variations can delay production without improving clarity.
Do mockups accurately represent the final printed result?
Mockups simulate placement and scale but do not guarantee exact color outcome. Always review a proof before bulk printing.
Can tote designs be repurposed for other merchandise?
Yes, provided the design is scalable and adaptable. Maintaining vector assets supports cross-format reuse.
This workflow emphasizes structural clarity, print accuracy, and realistic constraints. With the right template and a disciplined review process, branded tote bags can be produced efficiently without specialized design training.