Painting a room can dramatically transform its ambiance, adding vibrancy and character while also serving as a protective barrier for walls. Whether you are preparing a space for a personal touch or looking to enhance the aesthetic appeal of your home, a fresh coat of paint can yield significant rewards. The ability to select colors that evoke specific moods, combined with the precise technique of application, underscores the importance of professional approaches when undertaking a painting project.
One of the primary benefits of painting a room professionally is the increase in overall home value. A well-executed paint job can make a lasting impression on potential buyers, enhancing curb appeal and improving the interior’s visual impact. Professional painting services utilize high-quality materials and expert techniques to ensure that the final product is both polished and durable. By investing in a professional finish, homeowners not only upgrade the aesthetics but also protect their investment by fortifying walls against environmental factors.
This guide aims to equip readers with the necessary knowledge and skills to paint a room like a professional. From selecting the right tools and materials to mastering application techniques, this step-by-step approach will demystify the painting process. The objective is to uncover insider tips and tricks that seasoned painters utilize, ultimately enabling individuals to achieve a flawless result in their room painting endeavors. By following the guidance provided, readers can be empowered to take on their painting projects with confidence and expertise.
Choosing the Right Paint
When embarking on a painting project, selecting the appropriate type of paint is pivotal to achieving a satisfying result. There are two primary categories of paint: water-based and oil-based. Water-based paints, often referred to as latex paints, are favored for their ease of use, quick drying times, and lower levels of volatile organic compounds (VOCs). In contrast, oil-based paints offer a durable finish that is resistant to wear and tear, making them suitable for high-traffic areas or surfaces that require resilience. Both types have their unique attributes, and the choice may depend on the specific needs of the room being painted.
Paint finishes also play a significant role in how the final product looks and performs. Common finishes include matte, satin, eggshell, semi-gloss, and gloss. Matte finishes are ideal for ceilings, as they tend to hide imperfections, while satin or eggshell finishes work well in living rooms and dining areas, providing a soft sheen that is easier to clean. Semi-gloss and gloss finishes are best for kitchens and bathrooms due to their moisture resistance and durability against staining.
In addition to considering the type and finish of paint, matching the color to the room’s function is essential. For instance, soft blues and greens can create a serene atmosphere, making them suitable for bedrooms, whereas bold reds or yellows can energize a space, ideal for an office or playroom. Quality paint brands can greatly influence the outcome as well; opting for well-reviewed products can ensure better coverage and longer-lasting results. To select colors effectively, it is advisable to test samples on the wall before making a final decision, as lighting can dramatically affect how a color appears.
Essential Tools and Supplies for Painting
Embarking on a painting project requires not only skill but also the right tools and supplies. Selecting the appropriate equipment can significantly impact the quality of the finish and the overall experience. Here is a detailed overview of essential items needed for a successful room painting endeavor.
First and foremost, paint rollers are critical for achieving an even and consistent coat on large wall surfaces. They come in various nap lengths, which affect their ability to hold paint and provide texture. A medium nap roller (3/8 to 1/2 inch) is generally suitable for most walls, while a shorter nap roller works best on smooth surfaces.
Paint brushes are equally important and should be of high quality to ensure a smooth application. Different types of brushes serve varied purposes; for instance, angled brushes are ideal for cutting in around edges and corners, allowing for precise lines without the need for painter’s tape. A flat brush can be used for applying paint to larger areas and achieving a more professional look.
Another essential tool is painter’s tape. This tape is designed to create clean lines, preventing the paint from bleeding into areas where it is not desired. Properly applying painter’s tape along the edges can save time on clean-up and enhance the overall appearance of the painted room.
Drop cloths are also necessary for protecting floors and furniture from paint splatters and drips. These can be made from canvas or plastic, and selecting the right type depends on the size of the project and the materials used. In addition, a good-quality paint tray is vital for holding and loading paint onto your roller or brush conveniently.
Finally, other supplies such as spackle for filling holes and imperfections, as well as high-quality paint, are essential for a professional finish. Each tool and supply contributes to achieving the desired outcome and enhances efficiency throughout the painting process.
Preparing the Room for Painting
Successful painting projects begin long before the brush touches the surface. Proper preparation of the room is crucial for achieving a professional finish and ensuring the paint adheres effectively. The first step in preparation is moving furniture out of the workspace. Ideally, any large pieces should be removed entirely, but if this isn’t feasible, shifting them to the center of the room and covering them with drop cloths will suffice.
Next, laying protective coverings on the floor is essential to prevent paint splatters and drips from causing damage. Drop cloths made of canvas or plastic not only protect surfaces but are also easy to clean and can be reused for future projects. Additionally, tape should be applied to windows, baseboards, and any architectural features you want to keep paint-free. Using painter’s tape creates a sharp, clean line, leading to a more professional appearance when the job is completed.
Cleaning the walls and filling any holes or cracks is equally important. Use a mild detergent solution to wash the walls, ensuring that dirt and grease are removed before painting. This helps the paint adhere better, resulting in a longer-lasting finish. For holes and cracks, a quality filler should be used. After applying the filler, be sure to sand the area smooth once it is dry, allowing for an even application of paint.
Finally, ensuring proper ventilation and lighting is critical. Open windows to allow fresh air to circulate, which helps paint dry more efficiently and reduces odors. Bright, even lighting makes it easier to see any imperfections in your work. Taking these steps will facilitate a smoother painting process and lead to the stunning results you desire.
Mastering Painting Techniques
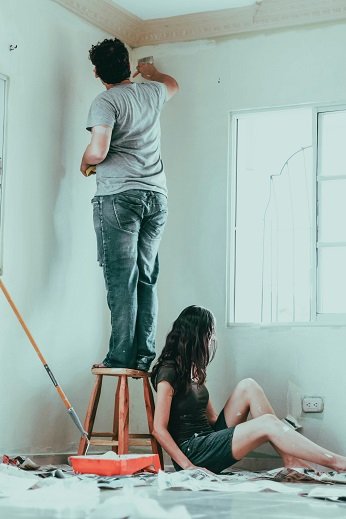
Achieving a professional-looking paint job involves mastering several essential techniques. One of the first skills to develop is cutting in, which entails painting around edges and corners with a brush. To do this effectively, use a high-quality angled brush. Load the brush with paint, but do not overload it—this prevents drips and allows for better control. Hold the brush at a slight angle and apply paint along the edge of trim or ceiling, using smooth, even strokes. A steady hand and patience will yield a clean line, enhancing the overall finish.
Another vital technique is using rollers for larger wall areas. When selecting a roller, consider the nap length of the roller cover based on the texture of the wall; a thicker nap is suitable for textured surfaces, while a shorter nap works well on smooth walls. Dip the roller into the paint tray and roll it along the tray’s ridges to remove excess paint. Start painting from the top and work your way down, applying the paint in a W pattern. This method helps to distribute the paint evenly and reduces the appearance of roller marks.
Applying multiple coats is critical to achieving a uniform finish. Allow each coat to dry fully as per the manufacturer’s instructions before adding the next. This can help in preventing color bleed and ensures that the final result is even. A good practice is to lightly sand between coats to create a smooth surface for the next layer. Additionally, maintaining a wet edge while painting prevents lap marks and creates a seamless appearance. Always work in sections and overlap slightly with the wet edge to achieve consistent coverage.
Understanding Drying and Curing Times
When tackling a painting project, it is essential to understand the concepts of drying and curing times, as they play a critical role in achieving a professional finish. Although often used interchangeably, drying and curing represent two distinct processes, each with its implications on the overall painting task.
Drying refers to the stage in which the paint transitions from a liquid state to a solid state. This phase is crucial as it indicates when a second coat can be applied or when painter’s tape can be removed without smudging the design. Generally, drying times can range from 30 minutes to a few hours depending on various factors including the type of paint used, the ambient temperature, and humidity levels. It is advisable to consult the manufacturer’s instructions on the specific product being used for accurate time frames.
Curing, on the other hand, is a slower process that continues after the paint has dried. During curing, the paint hardens fully and bonds with the surface, achieving optimal durability and resistance. This stage can take several weeks, particularly for latex paints. Understanding that a freshly painted room may feel dry to the touch while still being in the curing phase is vital. Rushing the process by placing furniture too soon can lead to indentations or marks that affect the aesthetic quality of the work.
Therefore, when undertaking a painting project, patience is key. To determine when it is safe to reapply coats or replace furniture, consider using a test area where a small spot of paint can be monitored for both drying and curing characteristics. By allowing adequate time for both drying and curing, one can ensure that the final results will reflect a high standard of craftsmanship and longevity.
Common Mistakes to Avoid
Painting a room can be an enjoyable and rewarding experience, but inexperienced painters often encounter several common mistakes that can hinder their progress and compromise the final result. By recognizing these pitfalls in advance, you can take proactive measures to prevent them and achieve a more polished look.
One major error is skipping essential preparation steps. Properly preparing the room is vital before you begin painting, as it sets the foundation for a successful job. Failing to clean the walls can lead to paint adhesion issues, while neglecting to tape edges and protect fixtures can result in uneven lines and splatters. Take the time to fill holes, sand surfaces, and apply primer where necessary. These actions will enhance the functionality of your paint job significantly.
Another common mistake is overloading brushes or rollers with paint. This often leads to drips and uneven application. To mitigate this, it is advisable to dip your brush or roller only a third of the way into the paint, then tap off any excess. This will help you maintain control while painting, providing a more consistent finish.
Additionally, many novice painters overlook the importance of testing colors before proceeding. Paint can look different on the wall than it does in a can or on a sample card. To avoid an undesired final look, always test your chosen color on a small wall area and review it at different times of the day. This practice not only helps you avoid dissatisfaction but can also save you from not having to repaint the entire room.
In case you find yourself falling into these common traps, remember that each issue can be rectified with some patience and careful adjustments. By paying attention to these elements, you will elevate your painting skills significantly and ensure a professional-looking finish in your living space.
Final Touches and Clean Up
Once the painting is complete, it is essential to carry out a thorough cleanup and conduct some final touches to ensure a polished and professional-looking result. Start by carefully cleaning your brushes and rollers. For latex-based paints, rinse the tools with warm soapy water until the water runs clear, ensuring that no paint residue remains. For oil-based paints, use mineral spirits or paint thinner as directed. It is vital to clean your tools immediately after use to maintain their condition for future projects.
Next, it is necessary to dispose of leftover paint responsibly. If you have small quantities of latex paint, you can leave the can open in a well-ventilated area to let it dry out completely before disposal. Always check local regulations regarding paint disposal, as many municipalities hold special collection events for hazardous materials. It is vital to avoid pouring paint down the drain to prevent environmental contamination.
Following the cleanup, inspect your painting work for any imperfections or areas that may need touch-ups. Utilize a small brush for these minor corrections, ensuring that the new paint blends seamlessly with the surrounding area. It is advisable to keep some paint aside from your original batch for future repairs and touch-ups.
Moreover, take time to evaluate the overall finish of the room. Look for any drips, uneven coverage, or missed spots. A well-executed painting job is just as much about the preparation and finishing touches as it is about the application of paint itself. Taking these final steps will enhance the overall aesthetic and longevity of your work, and will give your room a refreshed and professional appearance.
Conclusion and Additional Resources
Painting a room is both an art and a skill that can be developed with practice and dedication. Throughout this guide, we have explored various steps to ensure a professional-quality paint job, including preparing the space, selecting the right materials, and mastering techniques for a flawless finish. Each phase, from meticulous planning to the final touch-ups, contributes significantly to the overall outcome. By following the outlined steps, you can achieve a result that not only transforms your environment but also reflects your personal style.
As you embark on your painting journey, we encourage you to tap into your creativity. Experiment with colors, patterns, and techniques to find what resonates with you. Remember, taking pride in your work can elevate the satisfaction you derive from your home. Each brushstroke is an opportunity to express yourself, and a well-painted room can create a sense of accomplishment and joy.
For those looking to further enhance their painting skills, numerous resources are available. Online platforms host a variety of tutorials that cater to both beginners and more experienced individuals. Websites dedicated to home improvement, such as DIY blogs and video-sharing platforms, provide insights on advanced techniques and trends in room design. Additionally, local workshops or community colleges often offer courses on interior painting and decor, which can be invaluable for those interested in honing their craft.
In some cases, despite best efforts, the desired outcome may require the expertise of a professional. If you are facing an unusually large project or a particularly challenging space, it may be beneficial to consult with a painter who possesses the skills to turn your vision into reality. Engaging professionals can save time and ensure that the job is completed to a high standard.