Engaging in a DIY bathroom renovation can be a rewarding experience, merging creativity with practicality. This process allows homeowners to tailor their bathrooms according to their specific needs and preferences while potentially saving on labor costs associated with hiring professional contractors. By undertaking this project, individuals not only gain financial advantages but also the opportunity to create a personalized sanctuary that reflects their style. The realm of DIY bathroom renovations encompasses a variety of tasks, from simple paint jobs to extensive remodels involving plumbing and electrical work. Regardless of the extent of your project, careful planning is paramount. This initial stage includes budgeting, determining the scope of work, and selecting materials. A well-organized plan not only helps to prevent costly mistakes but also ensures that the renovation process proceeds smoothly and efficiently.
One of the most significant benefits of a DIY approach is the immense sense of accomplishment that comes from transforming your own space. Completing a bathroom renovation by oneself instills a feeling of pride and ownership, as homeowners can see tangible results of their hard work and creativity. Furthermore, customizing the bathroom to fit your tastes allows for an environment that is not only functional but also inviting and enjoyable.
Ultimately, embarking on a DIY bathroom renovation is a journey that provides not just updates to it but also an enhanced understanding of home improvement skills. Whether you are looking to modernize your space or simply refresh its look, this guide will equip you with the necessary insights to tackle your bathroom renovation project efficiently.
Assessing Your Bathroom Needs
Evaluating your current bathroom setup is a crucial step in the DIY bathroom renovation process. Begin by determining the key features of your existing space, focusing on fixtures, storage options, and lighting. Take note of any outdated elements that may hinder both functionality and aesthetics. For instance, an old faucet may not only detract from the overall design but could also lead to issues such as leaks, which could pose a risk for water damage.
Next, assess your storage needs. A bathroom often requires adequate space to store personal items such as toiletries and towels. If your current setup lacks sufficient storage, consider options that can maximize space, such as wall-mounted shelves or multi-functional furniture. By addressing these needs during the assessment phase, you can create a more efficient and organized environment.
Lighting plays an equally essential role in the functionality of a bathroom. Bright, well-placed lighting can make your space feel larger and more inviting. Evaluate your current light fixtures—are they providing adequate illumination for your daily tasks such as shaving or applying makeup? If the lighting is too dim or harsh, it may be time to explore alternatives that enhance the overall ambiance.
As you reflect on your bathroom’s shortcomings, compile a list of priorities based on personal needs and preferences. Consider aspects such as the design style you prefer, budget constraints, and potential for energy efficiency improvements. This prioritized list will serve as a fundamental tool in guiding your renovation decisions, ensuring that your project remains focused and aligned with your goals. Addressing these areas of need effectively will lead to a more functional and pleasing bathroom space.
Creating a Renovation Plan
Before embarking on a DIY bathroom renovation, establishing a detailed renovation plan is crucial for a successful outcome. This plan will not only serve as a roadmap for your project but also help in managing essential components such as your budget, timeline, and design goals.
First, setting a budget is a key step in the planning phase. A well-defined budget allows you to allocate funds appropriately across different aspects of the renovation, such as fixtures, materials, labor, and unexpected expenses. Conducting research on average costs associated with bathroom renovations will provide valuable insights into realistic budgeting. Aim to create a contingency fund—typically around 10% of your total budget—to accommodate unforeseen expenses that may arise.
Next, developing a clear timeline is vital for ensuring that your renovation stays on track. Consider breaking down the project into manageable phases, such as demolition, plumbing, installation, and finishing touches. Assign realistic deadlines to each phase, factoring in time for ordering materials and potential delays. Having a solid timeline will keep your project organized and help prevent frustration.
Your design goals should also be clearly articulated as part of your renovation plan. This includes determining the overall aesthetic you wish to achieve, such as modern, traditional, or minimalist designs. Collect inspiration from various sources—like magazines, Pinterest, or home improvement shows—and create a mood board that reflects your vision. Remember that functionality is just as important as aesthetics, so consider how different layouts and features will work together within the space.
Lastly, it is essential to obtain any necessary permits before starting your renovation. Depending on your locality, certain remodeling projects may require permits, especially those involving plumbing or electrical work. Research local regulations to ensure compliance and prevent legal issues down the line. In conclusion, creating a comprehensive renovation plan is instrumental in ensuring a smooth and successful bathroom renovation process, allowing you to transform your space efficiently and effectively.
Choosing the Right Materials and Fixtures
When embarking on a DIY bathroom renovation, selecting the right materials and fixtures is pivotal to achieving both durability and style. With a diverse array of choices available, it is essential to consider both aesthetic appeal and practical performance. Start by evaluating tiles, which can dramatically influence the overall ambiance of the bathroom. Ceramic and porcelain tiles are popular due to their water resistance and variety of designs, making them suitable for both walls and floors.
Another critical element to consider is the countertop material. Natural stone options such as granite or marble offer elegance and durability, though they often come at a premium price. Conversely, quartz countertops present a resilient alternative that is both low-maintenance and available in a plethora of colors and patterns, allowing homeowners to maintain style without compromising functionality.
When it comes to sinks and faucets, the range of styles can be overwhelming. Selecting a sink that complements your countertop material can create a cohesive look. Wall-mounted or vessel sinks are trendy choices that maximize space while providing a modern feel. For faucets, prioritize efficiency and ease of use. Look for models with water-saving features to enhance sustainability while also potentially reducing utility bills.
Source materials affordably by exploring local home improvement stores, online retailers, and wholesale suppliers. Keep an eye out for special discounts or clearance sales, which can provide high-quality materials at a reduced cost. Additionally, consider visiting reclaimed building material stores, where you can discover unique fixtures that will add character and individuality to your bathroom renovation. Adopting a thoughtful approach to material selection will ultimately lead to a successful DIY bathroom project, balancing aesthetic desires with practical needs.
Demolition and Preparation
Commencing a bathroom renovation requires a diligent approach to demolition and preparation. This stage is crucial as it sets the foundation for the subsequent phases of the project. First and foremost, safety should always be prioritized. Ensure to wear appropriate safety gear including gloves, goggles, and a mask to protect against dust and debris.
The initial step involves turning off the water supply and disconnecting any electrical sources to prevent accidents during the demolition process. Once safety measures are in place, you can begin to remove existing fixtures. Start with the toilet, sink, and any other plumbing fixtures; this typically involves unfastening bolts and carefully lifting them free.
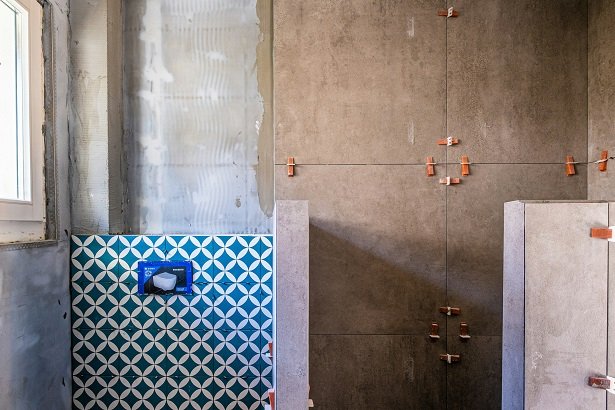
Next, prepare to tackle the tiles. Removing old tiles from walls or floors requires a few essential tools such as a tile chisel, hammer, and possibly a heat gun. If the tiles are particularly stubborn, applying heat can loosen the adhesive. Be meticulous when removing tiles to prevent damaging the underlying surface.
Cabinetry and vanities also need careful handling. They are usually secured with screws or brackets, which should be detached before attempting to remove the units. Using a pry bar might aid in loosening tightly fitted cabinets. Organize your workspace by clearing debris consistently; this will facilitate easier navigation and ensure a safer environment.
It’s important to dispose of removed materials responsibly. Check local regulations regarding the disposal of construction debris to ensure compliance. In summary, thorough preparation and careful demolition are essential in a DIY bathroom renovation. By implementing strategic techniques and prioritizing safety, you lay the groundwork for a successful transformation of your space.
Installing Essential Features
When embarking on a DIY bathroom renovation, understanding the installation process of essential features is crucial in ensuring both functionality and aesthetics. Key areas to focus on include plumbing, electrical work, and fixture installation. Performing these tasks correctly is vital, as mistakes can lead to significant issues down the line.
Starting with plumbing, it is essential to familiarize yourself with the existing plumbing layout. If you are relocating fixtures such as sinks or toilets, consult local plumbing codes to ensure compliance. For basic tasks like replacing faucets or showerheads, most homeowners can manage these with basic tools and guidance. However, if your project involves extensive plumbing modifications, hiring a licensed plumber is advisable. They possess the expertise required for complex work, ensuring the plumbing system operates smoothly and adheres to all safety regulations.
Electrical work is another critical aspect of bathroom renovations. Essential lighting fixtures, exhaust fans, and additional outlets may require installation. If you plan on installing new electrical components, turn off the power supply to the area and familiarize yourself with local electrical codes. While some simple tasks, like changing light fixtures, can be managed by a homeowner, anything involving new wiring should be left to a qualified electrician. This ensures installed systems are safe and up to code, preventing potential hazards.
Fixture installation, including vanities, toilets, and mirrors, can often be completed as a DIY project. When installing these items, use appropriate hardware and follow manufacturer instructions carefully to avoid complications. It is beneficial to have a friend or family member assist with heavier items like vanities to ensure stability and alignment. Taking the time to properly install each feature significantly enhances the longevity and functionality of your bathroom renovation.
Finishing Touches and Aesthetic Upgrades
Once the core renovations of your bathroom have been completed, the finishing touches play a crucial role in enhancing its overall appeal. Start by adding a fresh coat of paint to the walls. Selecting a color scheme that aligns with your desired aesthetic can dramatically transform the space. For instance, light blues or greens can evoke a calming atmosphere, while bolder shades can create a modern and vibrant look. When painting, ensure you choose moisture-resistant paint to withstand the bathroom’s humidity.
After the paint dries, you can focus on adding decor items that reflect your personal style. Wall art, decorative mirrors, and stylish shelving can elevate the space without incurring significant costs. Consider using framed prints or canvas art that complements your color choices. A well-placed mirror can also create an illusion of a larger space while adding functionality.
Next, accessorize your bathroom to harmonize with the overall design theme. Items such as towels, bath mats, and shower curtains are not only functional but also serve as decorative elements. Opt for coordinating colors and patterns that tie your design together. For instance, if you have chosen a coastal theme, consider towels with seashell patterns and a matching shower curtain.
Lighting fixtures are another area where you can make impactful changes. Replacing old light fixtures with more contemporary options can instantly modernize your bathroom. Additionally, consider installing dimmable lighting to allow for versatility in mood and ambiance.
Incorporating plants can also enhance the room’s aesthetic while improving air quality. Plants such as ferns or succulents thrive in humid environments and require minimal maintenance. Finally, complete your bathroom renovation by ensuring all accessories, from soap dispensers to drawer pulls, align with your aesthetic vision, creating a cohesive and inviting space.
Maintaining Your Newly Renovated Bathroom
Once you complete your DIY bathroom renovation, ongoing maintenance is essential for preserving the beauty and functionality of your space. Establishing a cleaning routine is crucial; regular cleaning not only maintains aesthetics but also prevents the buildup of grime and mildew. Consider using non-abrasive cleaners on surfaces such as countertops, tiles, and fixtures to avoid scratches and prolong their life. It’s advisable to clean your bathroom at least once a week, which helps in the early detection of potential problems.
In addition to a routine cleaning schedule, implement occasional inspections to ensure all components of your bathroom remain in excellent condition. Check for signs of water damage, particularly around sinks, bathtubs, and toilets, as these areas are prone to leaks. Look at caulking and grouting regularly; if you notice cracks or peeling, these should be addressed promptly to prevent moisture infiltration. A small investment of time in inspecting your bathroom can help you catch problems before they escalate into costly repairs.
Performing minor repairs as needed will also enhance the longevity of your renovations. Keep a basic toolkit handy, including a plunger, a wrench, and some plumbing tape, to assist with small issues as they arise. For instance, if you notice a dripping faucet, fixing it sooner rather than later can help stave off higher water bills and reduce the risk of water damage to surrounding areas. Simple tasks like replacing worn-out seals or tightening loose fixtures can be accomplished with minimal effort and can significantly impact the long-term health of your newly renovated bathroom.
Conclusion and Encouragement for DIY Renovation
In summary, embarking on a DIY bathroom renovation can be an exceptionally rewarding endeavor. As discussed throughout this guide, careful planning is fundamental to a successful remodel, whether you are updating fixtures, painting walls, or redesigning the entire layout. By judiciously selecting materials and employing various techniques, you can create an aesthetically pleasing and functional space that meets your specific needs.
The satisfaction derived from transforming your own bathroom cannot be overstated. Not only does it provide a sense of achievement, but it also significantly adds value to your home. Homeowners often find that a DIY renovation leads to both improved quality of life and an increased resale value. The financial benefits of completing such a project on your own can be considerable, as you essentially save on labor costs while ensuring the quality and aesthetic match your personal standards.
We encourage you to embrace the challenge of renovating your bathroom. Every small achievement builds your skills and confidence in undertaking larger projects in the future. Remember that patience is key, and each step forward, no matter how minor, is a stepping stone toward your ultimate vision.
As you venture into this rewarding project, share your journey and insights with us and fellow DIY enthusiasts. Your experiences will not only inspire others but also create a community where ideas, tips, and success stories can flourish. Happy renovating!